Plan a Backyard Forest
Plan your own wildlife-friendly food forest

The Backyard Forest by Jake Rayson
natureworks.org.uk/backyard/plan
Press P to see notes and credits
Work licensed under Creative Commons Attribution-NonCommercial-ShareAlike, embedded work may have other licenses.
Course overview

What you’ll learn
- Create a map
- Record observations
- Measuring techniques
- Make wishlists
Map — Observations — Measure — Wishlist
1. Create a map

“The map is not the territory”
Map — Observations — Measure — Wishlist
1. Create a map
- Mark important features
- Try tree positions
- Paper, online or CAD
Map — Observations — Measure — Wishlist
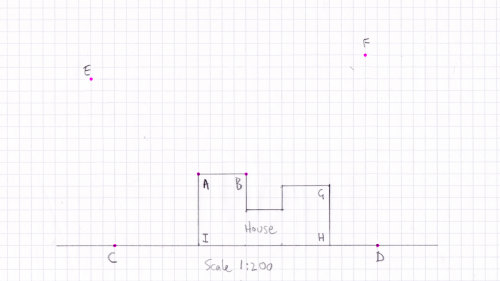
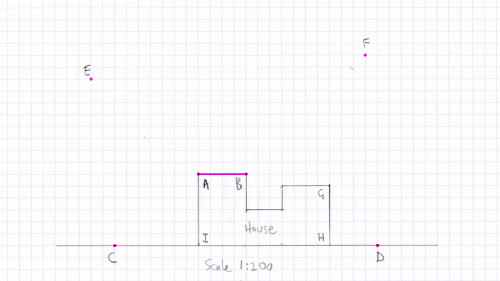
Paper map

Work out your scale!
Map — Observations — Measure — Wishlist
Paper map
- 1:50 means 1m = 2cm
- Average UK garden 16m x 5m
- At 1:50 scale, 16m x 5m → 32cm x 10cm
Map — Observations — Measure — Wishlist
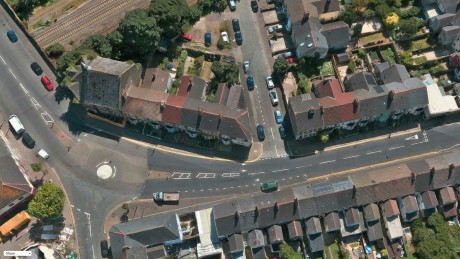
CAD map
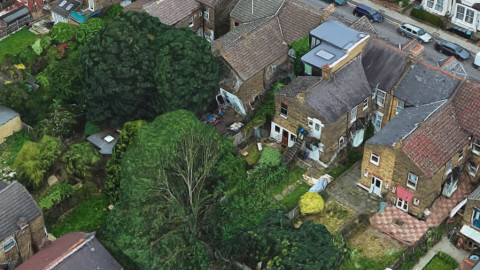
- Satellite screenshot
- Metres per pixel
- Scale in QCAD
Map — Observations — Measure — Wishlist
CAD map: 1. Satellite screenshot
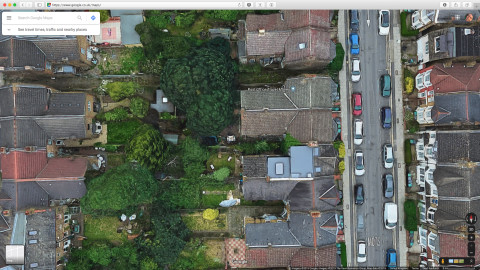
- Highest resolution possible
- Be sure to include scale, in metres
- Save as good quality JPEG
Map — Observations — Measure — Wishlist
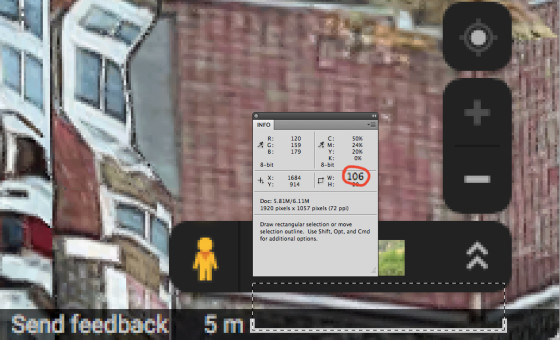
CAD map: 2. Metres per pixel
- Measure pixel length of metres scale
- Metres per pixel
5m ÷ 106px = 0.047169811 - Image scale factor = metres per pixel
Map — Observations — Measure — Wishlist
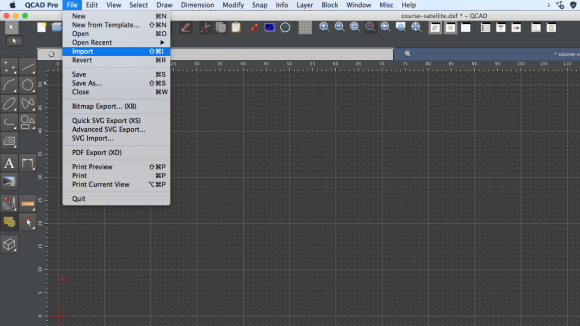
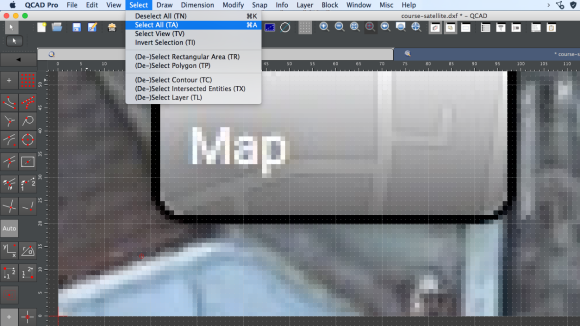
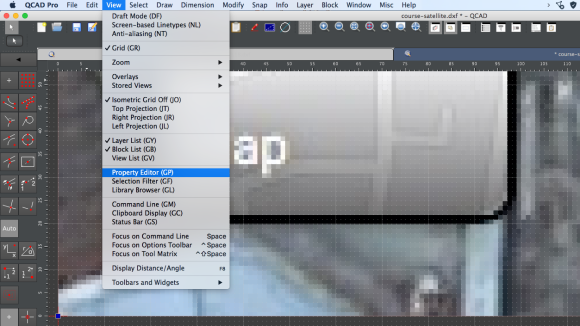
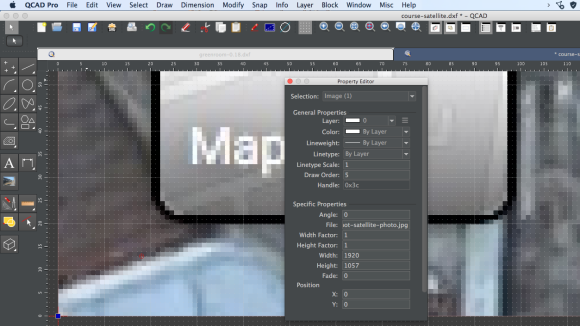
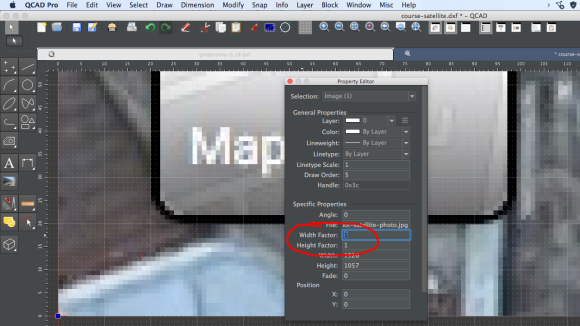
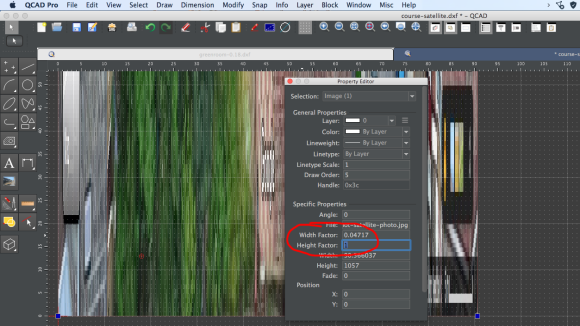
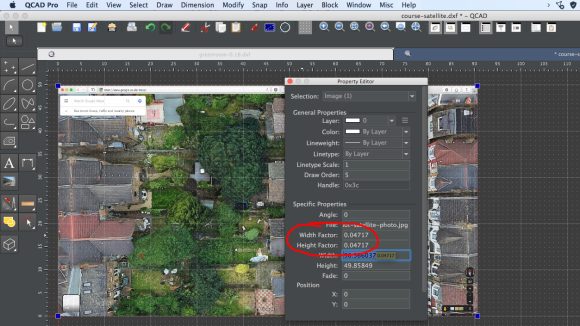
CAD map: 3. Scale in QCAD
File → Import,Select → Select All👈View → Property EditorWidth & Height Factor:image scale factor
Our image
scale factor is
metres per pixel
0.047169811
Map — Observations — Measure — Wishlist
CAD map: 3. Scale in QCAD
File → Import,Select → Select All👈View → Property EditorWidth & Height Factor:image scale factor
Our image
scale factor is
metres per pixel
0.047169811
Map — Observations — Measure — Wishlist
CAD map: 3. Scale in QCAD
File → Import,Select → Select AllView → Property Editor👈Width & Height Factor:image scale factor
Our image
scale factor is
metres per pixel
0.047169811
Map — Observations — Measure — Wishlist
CAD map: 3. Scale in QCAD
File → Import,Select → Select AllView → Property Editor👈Width & Height Factor:image scale factor
Our image
scale factor is
metres per pixel
0.047169811
Map — Observations — Measure — Wishlist
CAD map: 3. Scale in QCAD
File → Import,Select → Select AllView → Property EditorWidth & Height Factor:image scale factor 👈
Our image
scale factor is
metres per pixel
0.047169811
Map — Observations — Measure — Wishlist
CAD map: 3. Scale in QCAD
File → Import,Select → Select AllView → Property EditorWidth & Height Factor:image scale factor 👈
Our image
scale factor is
metres per pixel
0.047169811
Map — Observations — Measure — Wishlist
CAD map: 3. Scale in QCAD
File → Import,Select → Select AllView → Property EditorWidth & Height Factor:image scale factor 👈
Our image
scale factor is
metres per pixel
0.047169811
Map — Observations — Measure — Wishlist
Checklist

Download checklist PDF
bit.ly/forest-garden-checklist
- Observations checklist
- Features wishlist
- Plants wishlist
Map — Observations — Measure — Wishlist
2. Observations

- Position 👈
- Elements
- Features
- Situation
Map — Observations — Measure — Wishlist
2.1 Position

- Orientation 👈
- Elevation
- Slope
Map — Observations — Measure — Wishlist
2.1 Position

- Orientation
- Elevation 👈
- Slope
Map — Observations — Measure — Wishlist
2.1 Position
- Orientation
- Elevation
- Slope 👈
Map — Observations — Measure — Wishlist
2. Observations

- Position
- Elements 👈
- Features
- Situation
Map — Observations — Measure — Wishlist
2.2 Elements
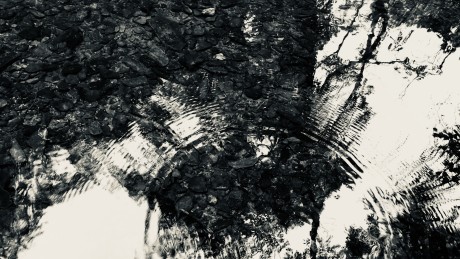
- Water 👈
- Earth
- Wind
- Sun
- Climate
Map — Observations — Measure — Wishlist
2.2 Elements
- Water
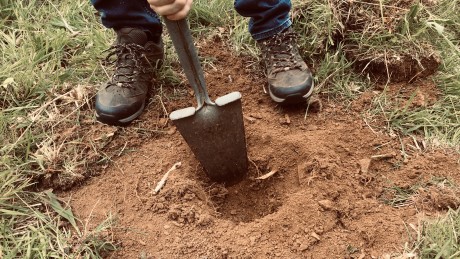
- Earth 👈
- Wind
- Sun
- Climate
Map — Observations — Measure — Wishlist
2.2 Elements
- Water
- Earth
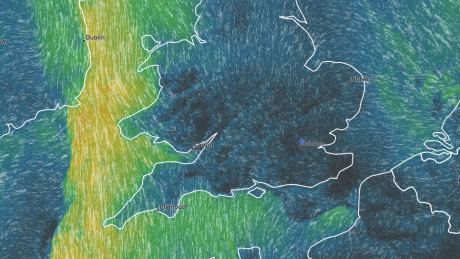
- Wind 👈
- Sun
- Climate
Map — Observations — Measure — Wishlist
2.2 Elements
- Water
- Earth
- Wind
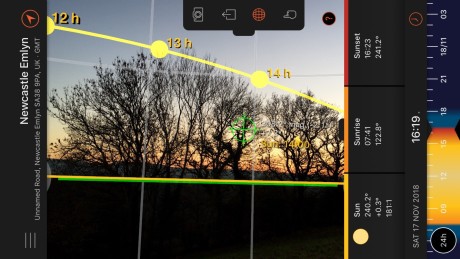
- Sun 👈
- Climate
Map — Observations — Measure — Wishlist
2.2 Elements
- Water
- Earth
- Wind
- Sun
- Climate 👈

Map — Observations — Measure — Wishlist
2. Observations
- Position
- Elements
- Features 👈
- Situation
Map — Observations — Measure — Wishlist
2.3 Features
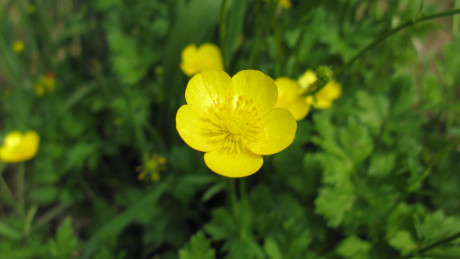
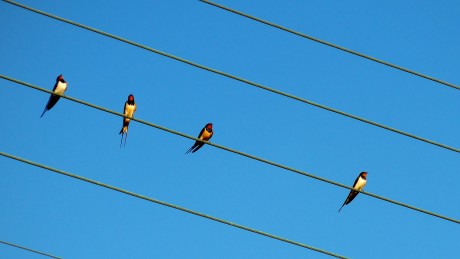
- Wildlife 👈
- Utilities
- Structures
- Access
Map — Observations — Measure — Wishlist
2.3 Features
- Wildlife
- Utilities 👈
- Structures
- Access
Map — Observations — Measure — Wishlist
2.3 Features
- Wildlife
- Utilities
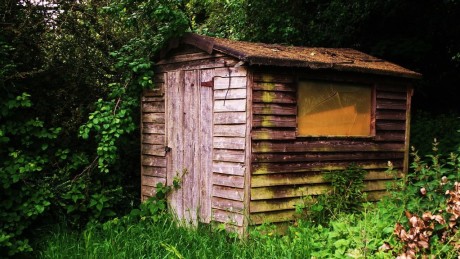
- Structures 👈
- Access
Map — Observations — Measure — Wishlist
2.3 Features

- Wildlife
- Utilities
- Structures
- Access 👈
Map — Observations — Measure — Wishlist
2. Observations
- Position
- Elements
- Features
- Situation 👈
Map — Observations — Measure — Wishlist
2.4 Situation
- Privacy 👈
- Noise
- Pollution
Map — Observations — Measure — Wishlist
2.4 Situation

- Privacy
- Noise 👈
- Pollution
Map — Observations — Measure — Wishlist
2.4 Situation
- Privacy
- Noise
- Pollution 👈
Map — Observations — Measure — Wishlist
3. Measure
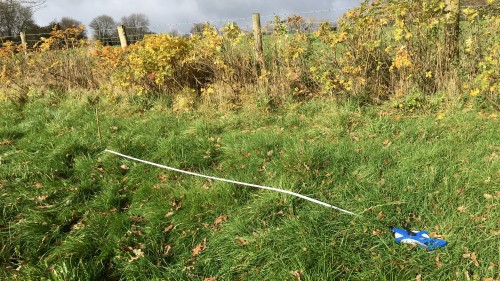
- Direct line
- Running dimension
- Triangulation
- Offsets
Map — Observations — Measure — Wishlist
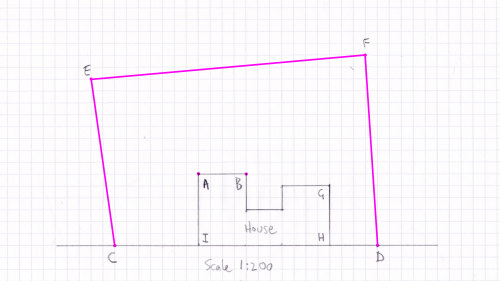
3. Measure
- Direct line 👈
- Running dimension
- Triangulation
- Offsets
Map — Observations — Measure — Wishlist
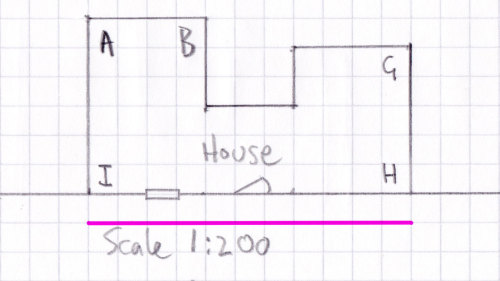
3. Measure
- Direct line 👈
- Running dimension
- Triangulation
- Offsets
Map — Observations — Measure — Wishlist
3. Measure

- Direct line
- Running dimension 👈
- Triangulation
- Offsets
Map — Observations — Measure — Wishlist
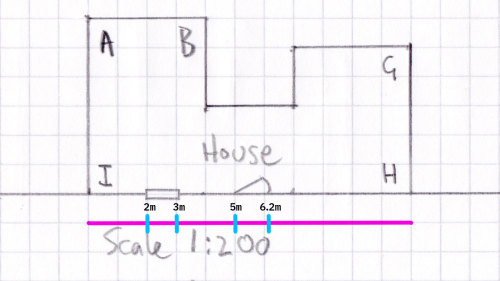
3. Measure
- Direct line
- Running dimension 👈
- Triangulation
- Offsets
Map — Observations — Measure — Wishlist
3. Measure

- Direct line
- Running dimension 👈
- Triangulation
- Offsets
Map — Observations — Measure — Wishlist
3. Measure

- Direct line
- Running dimension 👈
- Triangulation
- Offsets
Map — Observations — Measure — Wishlist
3. Measure

- Direct line
- Running dimension 👈
- Triangulation
- Offsets
Map — Observations — Measure — Wishlist
3. Measure
- Direct line
- Running dimension 👈
- Triangulation
- Offsets
Map — Observations — Measure — Wishlist
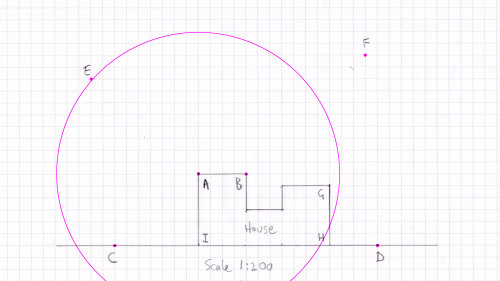
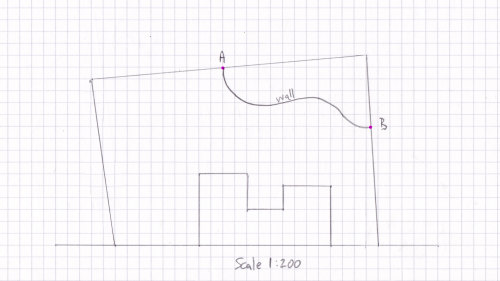
3. Measure

- Direct line
- Running dimension
- Triangulation 👈
- Offsets
Map — Observations — Measure — Wishlist
3. Measure

- Direct line
- Running dimension
- Triangulation 👈
- Offsets
Map — Observations — Measure — Wishlist
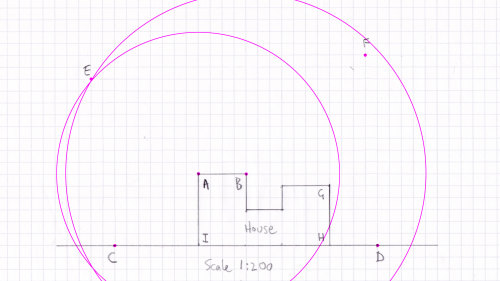
3. Measure

- Direct line
- Running dimension
- Triangulation 👈
- Offsets
Map — Observations — Measure — Wishlist
3. Measure
- Direct line
- Running dimension
- Triangulation 👈
- Offsets
Map — Observations — Measure — Wishlist
3. Measure

- Direct line
- Running dimension
- Triangulation 👈
- Offsets
Map — Observations — Measure — Wishlist
3. Measure

- Direct line
- Running dimension
- Triangulation 👈
- Offsets
Map — Observations — Measure — Wishlist
3. Measure
- Direct line
- Running dimension
- Triangulation 👈
- Offsets
Map — Observations — Measure — Wishlist
3. Measure
- Direct line
- Running dimension
- Triangulation 👈
- Offsets
Map — Observations — Measure — Wishlist
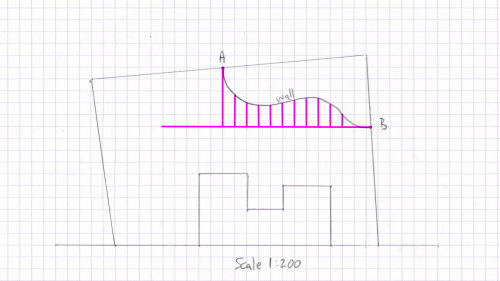
3. Measure
- Direct line
- Running dimension
- Triangulation
- Offsets 👈
Map — Observations — Measure — Wishlist
3. Measure

- Direct line
- Running dimension
- Triangulation
- Offsets 👈
Map — Observations — Measure — Wishlist
3. Measure
- Direct line
- Running dimension
- Triangulation
- Offsets 👈
Map — Observations — Measure — Wishlist
4. Wishlists
- Features
- Plants
- Pictures
Map — Observations — Measure — Wishlist
4.1 Features wishlist

- Wildlife: pond, native, logpile 👈
- Water conservation
- Nutrient budget
- Seating
- Polytunnel/greenhouse
Map — Observations — Measure — Wishlist
4.1 Features wishlist

- Wildlife: pond, native, logpile
- Water conservation 👈
- Nutrient budget
- Seating
- Polytunnel/greenhouse
Map — Observations — Measure — Wishlist
4.1 Features wishlist
- Wildlife: pond, native, logpile
- Water conservation
- Nutrient budget 👈
- Seating
- Polytunnel/greenhouse
Map — Observations — Measure — Wishlist
4.1 Features wishlist

- Wildlife: pond, native, logpile
- Water conservation
- Nutrient budget
- Seating 👈
- Polytunnel/greenhouse
Map — Observations — Measure — Wishlist
4.1 Features wishlist

- Wildlife: pond, native, logpile
- Water conservation
- Nutrient budget
- Seating
- Polytunnel/greenhouse 👈
Map — Observations — Measure — Wishlist
4.2 Plants wishlist
- Plants For A Future
- RHS Plant Finder with native filter
- Think native wildflowers
Map — Observations — Measure — Wishlist
4.2 Plants wishlist
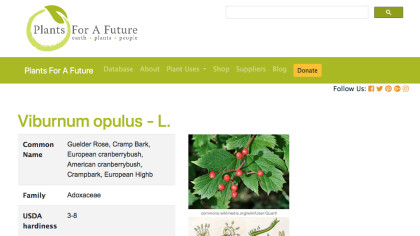
- Plants For A Future 👈
- RHS Plant Finder with native filter
- Think native wildflowers
Map — Observations — Measure — Wishlist
4.2 Plants wishlist
- Plants For A Future
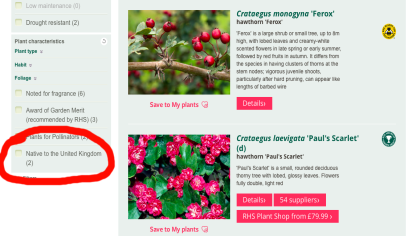
- RHS Plant Finder with native filter 👈
- Think native wildflowers
Map — Observations — Measure — Wishlist
4.2 Plants wishlist

- Plants For A Future
- RHS Plant Finder with native filter
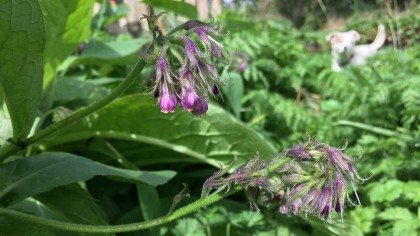
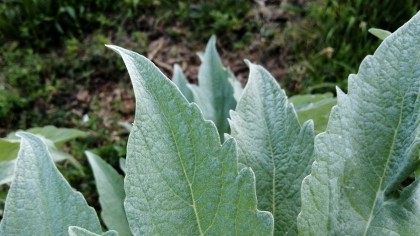
- Think native wildflowers 👈
Map — Observations — Measure — Wishlist
4.3 Pictures

- Look & feel
- Features
- Plants
- Upload to Pinterest
Map — Observations — Measure — Wishlist
Backyard forest takeaways
- Observe
- Write it down
- Take your time